I’ve always had a love-hate relationship with gardening. I love it when other people do it, I hate to do it myself. The main reason is that I’m terrible at it and have never had much success. There is one exception to the rule and it’s the only time I have fun in the garden. And truth be told, it’s hard to call it gardening. About 10 years ago I planted a fig tree. It struggled the first few years and the root system was shallow. It actually fell over a couple of times. I staked it, babied it, and lo and behold it survived. A couple of years later I planted a second one. These two trees are now healthy, huge and doing great. Every year in early June we are greeted by thousands of tiny figs fruiting and we anticipate a bumper crop. In a small way it signals the onslaught of summer in North Texas. It’s something wonderful to look forward to even while we’re dreading the upcoming heat.
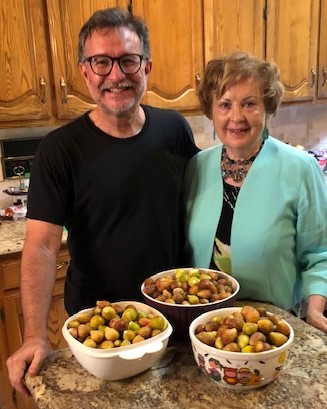
This was a great year and we’ve already collected over 50 pounds of figs.
Now, what do you do with so many figs? Well, one thing is that you give them away by letting family and friends come over to pick. The thing I like to do with mine is broil them with a little goat cheese on top of them. So, I freeze as many as I can, and unpack them little by little throughout the year.
The third thing I like to do with figs is to can fig preserves with my Mom. They are the perfect fruit for making preserves, and it’s a great treat to spread on some whole-wheat bread for breakfast throughout the year.
I grew up eating fig preserves that my mother made, and we occasionally plan a summer afternoon to get together and cook up and can some fig preserves. There are really only two ingredients for our fig preserves: figs and sugar. Lots of figs and as much sugar as necessary. No vanilla, or cloves, or ginger for us. Just figs and sugar.
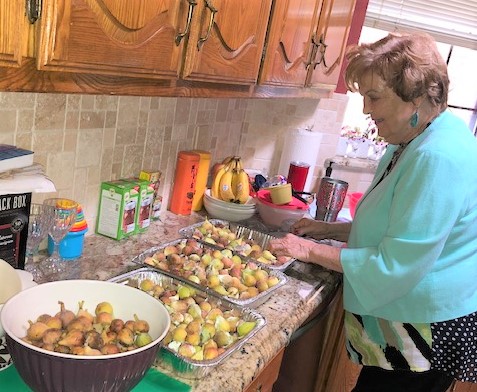
The first job is to pick the figs. This year Mom came over and picked about ten pounds, that’s actually a lot of work. Plus, Terri donated about 3 pounds to our effort that she had picked. (Mine all go in the freezer to make broiled figs & goat cheese breakfasts!). Next, cut off all the stems, and then wash the figs.
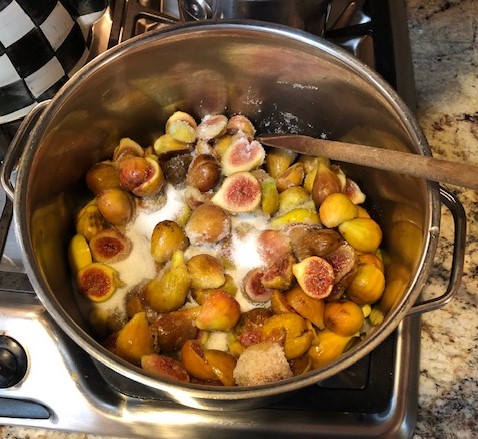
The real art is in the amount of sugar to add to the figs. They are naturally very sweet, so they don’t need as much sugar as when making preserves with tart fruit like blackberries, or even peaches. We added about half as much sugar as figs. For every 4 cups of figs added to the pot cover with 2 cups of sugar.
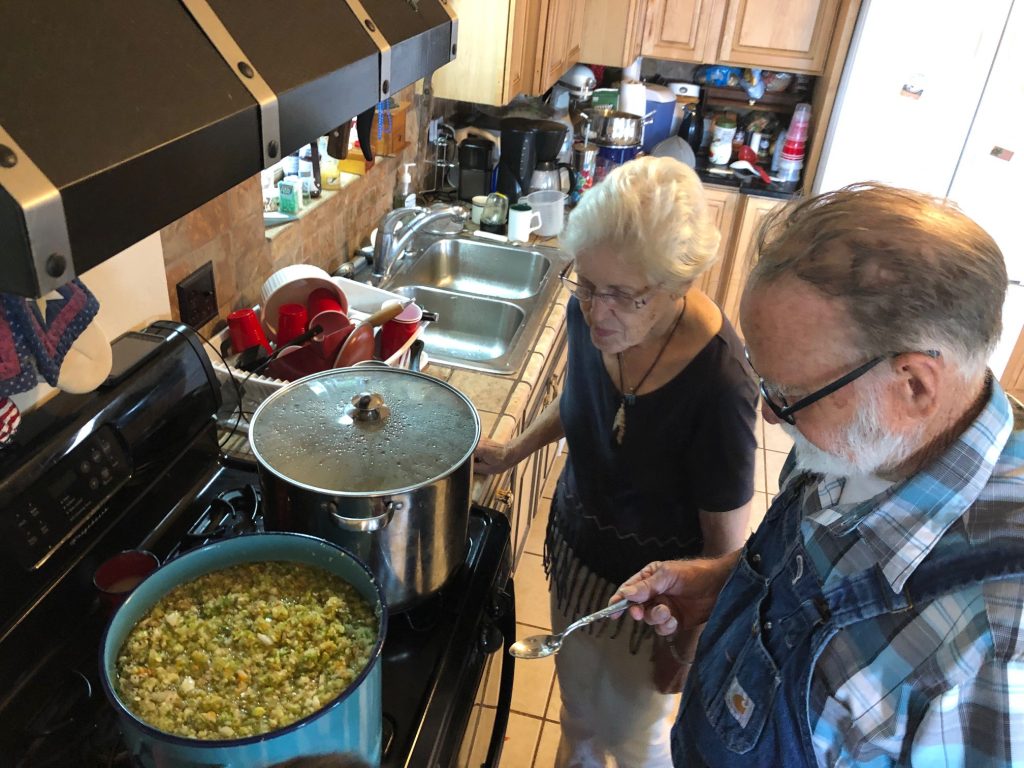
Put the pots of figs and sugar on a low flame. As the sugar heats up it turns into syrup and begins to cook the figs.
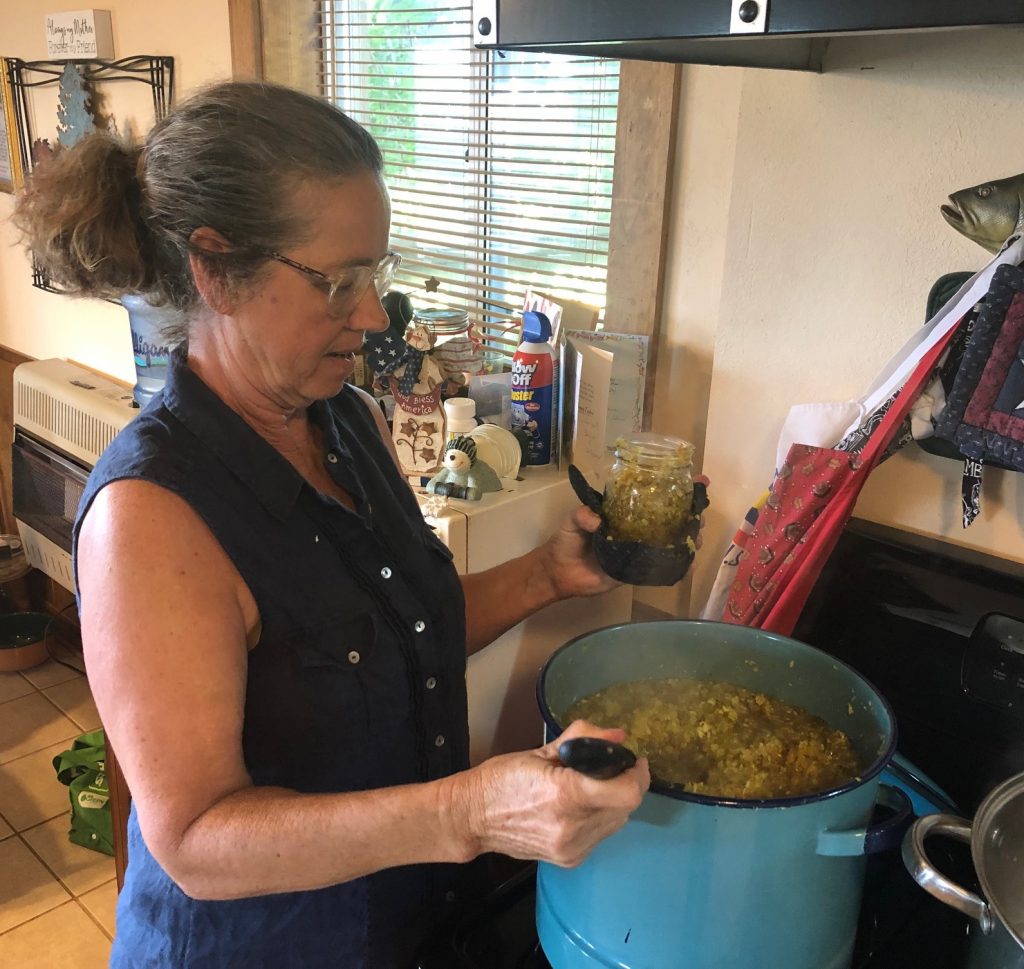
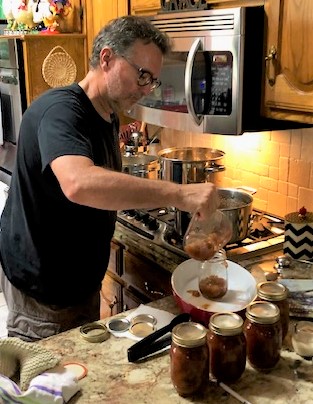
Let them simmer on a very low boil for about an hour, stirring every 5 minutes or so. Then the figs will have all turned a gorgeous amber brown. Boil the jars and lids. Retrieve them from the boiling water carefully with some tongs. It’s very handy to have a Pyrex 2-cup measuring cup to dip into the hot fig preserves and pour into the hot jars.
Carefully clean off the jar tops, screw on the lids and caps tightly. From beginning to end it takes about 4 to 5 hours. That does not include the time it takes to pick the figs. When it’s all said and done, there is usually half a jar left over that isn’t worth putting a lid on, so we make some toast and happily finish them off as our reward.